I designed and built a portable steel-frame miter-saw table for use in the Macalester College Theater Department Scene Shop. The table is 6$\ft$ long, capable of extending to 12$\ft$ with folding extensions. I installed a quick-access trash cut-out for discarding small scraps immediately after cutting. The table allows the saw to operate at the full range of its original miter angles. A vacuum below with a smart switch turns on whenever the miter saw is used, limiting the amount of sawdust. The table frame is steel mounted on four casters.
Stationary Miter Saw Bench
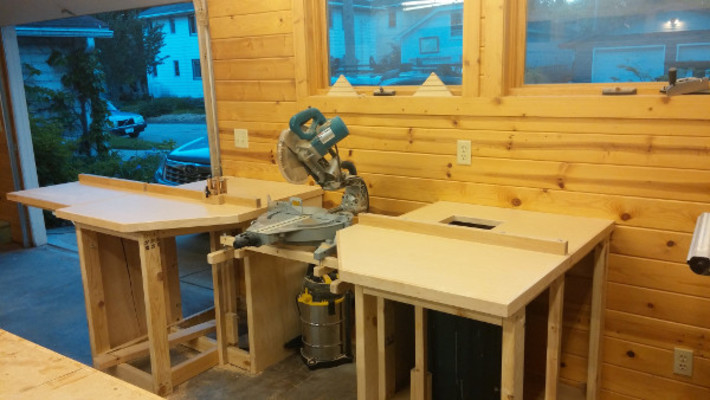
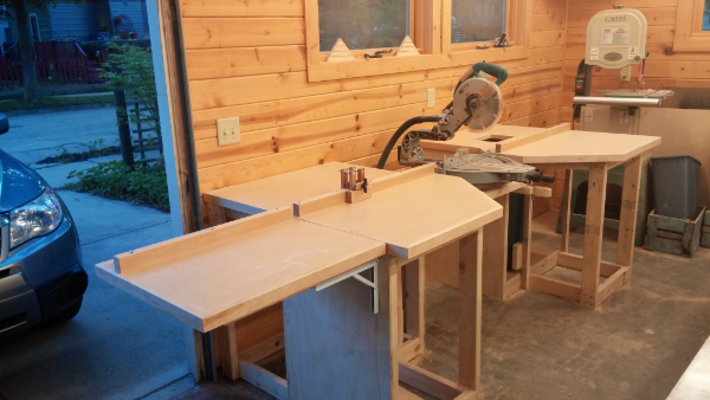
I couldn’t resist building another miter saw bench at my next shop destination. This bench includes much of the same functionality of the first table I built. The bench is about 8$\ft$ long, with a 3$^\prime$ 6$\in$ extension, has a hole for scraps, and includes a smart switch vacuum-saw interface. Solid maple facing protects the edges of the maple melamine table-top.
One drastic improvement of this miter-bench design is the adjustable position in all three dimensions of the saw. I used a series supports and bolts between the two bench sides to position the miter saw in good alignment with the fence.
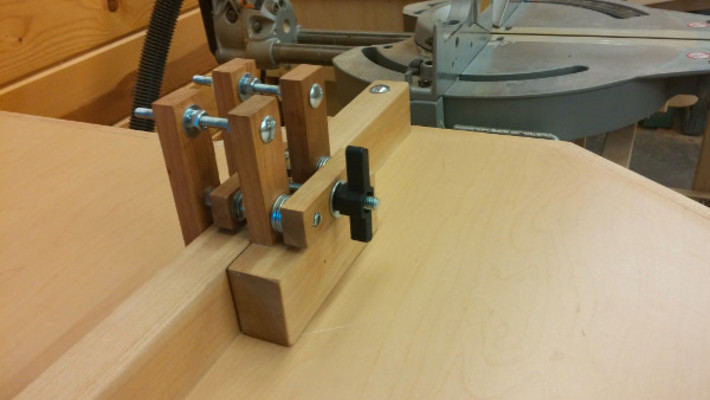
Finally, I also built a fence clamp out of scrap cherry and maple. The clamp is elegant, and compliments the miter bench.
Construction
Rolling Miter Bench
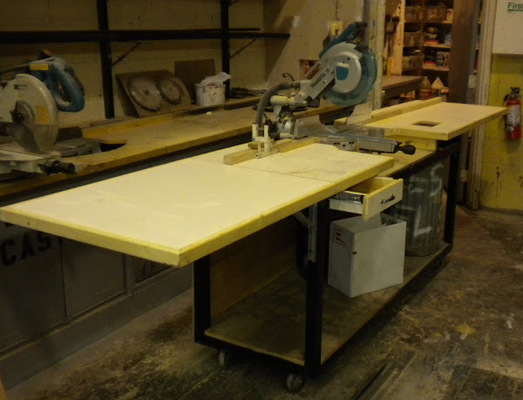
During my time as a tech theater assistant carpenter, we often needed to crosscut a large amount of construction lumber on the fly on stage. This activity warranted a rolling miter table. The previous miter table had a wooden frame which sagged in the middle at the end of its lifetime. Our solution was a steel-frame miter-table on casters, with extension flaps.
Design
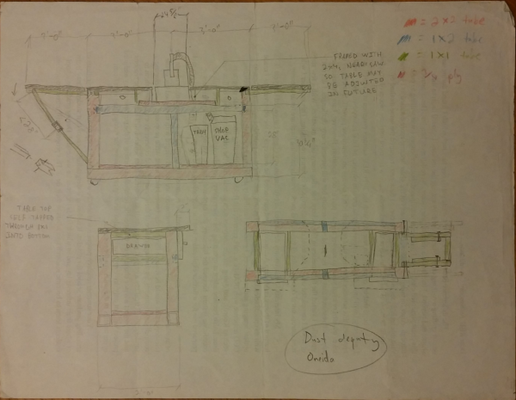
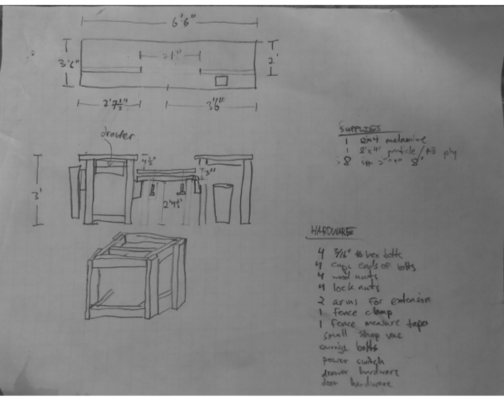
I designed the table in a few steps, first sketching (see below for an example), then rendering in a computer-animated-graphics program. I adjusted the table design several times with the technical director’s input, converging on the final design shown below.
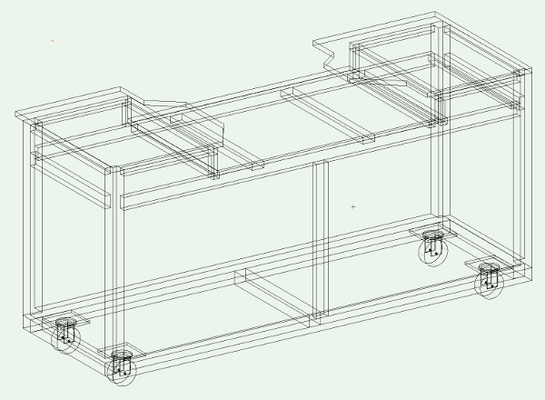
Frame
The frame consists of from 16-gauge steel 2$\ft$ $\times$ 4$\ft$ and 4$\ft$ $\times$ 4$\ft$ tube steel. I used a MIG welder to join the frame. To support the casters I installed 1/4$\in$ steel plates at the bottom corners of the frame.
Table Top
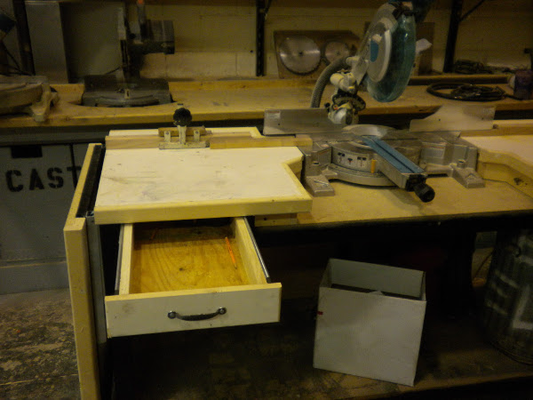
The table top is simple white melamine with pine facing. I installed a pine fence across the bench and the extensions. To keep the workspace clean I installed a drawer which tends to keep the tape measure, pencil, and speed square.
Stationary Miter Bench
Design
The stationary bench was a much simpler design than the rolling miter bench. My previous experience with leveling the miter saw with the table-top of the rolling bench was not positive. This time I designed a mount for the miter saw which could be adjusted in all directions. The design was relatively simple, so I only made a sketch of the table before construction shown below.
Frame
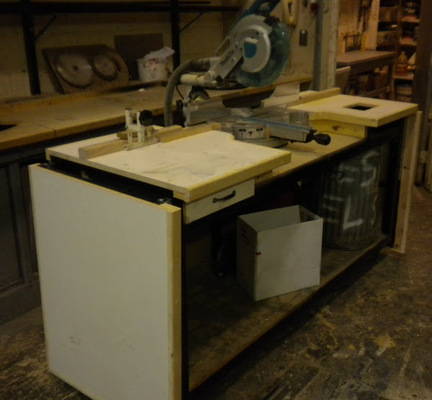
I wanted to avoid using screws as much as possible to prevent deformation of the table over time, so the majority of the joints are bolted together. Below shows the bench after I completed the frame.
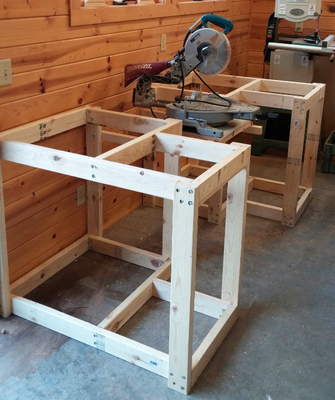
Table-top
The next step was of course to put the maple melamine table-top on. I cut the table-top in the center of the bench to allow for the full range of miter-angles available to the saw. I took my time installing the maple facing along the edges of the table-top. Melamine is quite weak and tends to chip at the edges.
After the table-top and facing were installed, I installed the solid-maple fence. I secured the fence with carriage bolts which carried through the fence and the middle joist of the bench frame.
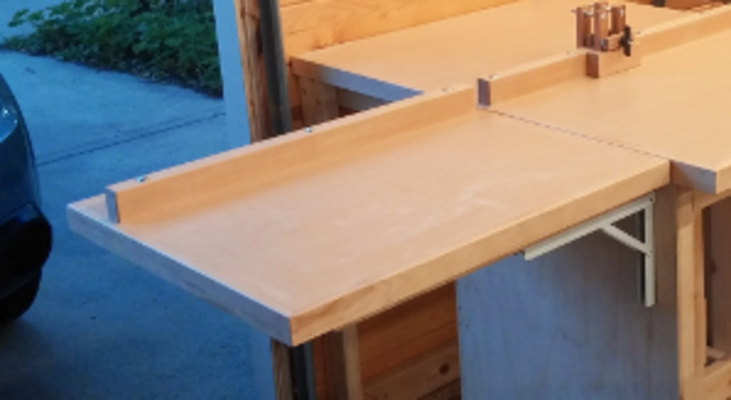
Table Extension
Next I constructed the bench extension. To reinforce the extension I glued another layer of scrap melamine to the under-side of the extension. I bolted more of the fence onto the extension. Finally I mounted the extension with a folding angle bracket onto the end of the table. The extension protrudes only 2$\in$ from the bench when folded.
Fence Stop
The last step was to construct a fence stop. Purchasing a fence stop was out of the question for me considering the starting price was around $100. I mocked up several fence stops out of pine and with many combinations of bolts and nuts. I converged on the design shown below, constructed out of cherry and maple.